Getting Started with File Transfer
Quick Access to Resources
- Specifications in PDF – Understand our data structure for purchase orders and measurements.
- Sample of Purchase Orders in CSV – Upload in /{bucket_name}/upload/po
- Sample of Measurement Charts in CSV (Bulk) – Upload in /{bucket_name}/upload/pom
- Sample of Measurement Chart in CSV (Single) – Upload in /{bucket_name}/upload/pom
- Sample of Organizations in CSV – Upload in /{bucket_name}/upload/organization
- Sample of Lab Test Reports in CSV (Beta) – Upload in /{bucket_name}/upload/labtestreport
In order to download the files, right-click and click “Save As”.
File Transfer Steps
This guide will illustrate how to accomplish proper data integration with the Inspectorio Sight’s Platform via File Transfer. The purpose of File Transfer is to send data to the back-end of the Inspectorio Platform. File Transfer is one-way only. While you will be able to send data to Inspectorio, your system will not be able to receive data from Inspectorio.
To get started with File Transfer, Inspectorio will provide you with a storage service account so you can test the connectivity on our testing environment, send a few simple Purchase Orders by transferring a sample file, and then test your production storage service account connectivity.
- Configure a File Transfer Client: Set up an application or client to interact with your storage service account
- Transfer a Sample PO: Establish connectivity with the testing environment by transferring a sample PO file
- Data Mapping: Work on data mapping between your system and the data points expected by Inspectorio
- Send Real POs: Send Purchase Orders to your testing storage service account with some real data coming from your systems
- Production Authentication: Switch the destination of your file transfer client to point to your production storage service account provided by Inspectorio
1. Configure a File Transfer Client
To enable File Transfer with Inspectorio, we have set up storage service account where you can transfer files. This account is cloud storage resource which stores data. Access is secured by authorized credentials and information is protected through transit via HTTPS or SFTP. Uploading data to that account will automatically transfer data into your account of Inspectorio SIGHT in a one-way transfer.
In order to upload files to your provided storage service account, Inspectorio will provide you with the following information:
- Account ID: #####
- Password: ######
- Region: ######
- Account Name: ######
When you have your credentials, you will need to install a client/software to interact with your storage service account. Here is a list of softwares for your reference, note that we do not hold any relationship with these software companies and we do not hold ourselves responsible for the quality or nature of their services.
2. Send a Sample PO
To verify the configuration of the integration, you should try to upload a sample file containing Purchase Orders.
The root directory contains a folder called Upload, which you can expand to view sub-folders organization, po, and pom.
You can download the sample PO file here
If you are using a client like Cyberduck, then you can follow these to upload the PO file:
- Download the sample PO file (right click and select
Save As) - Within the root directory, expand the
Uploadfolder to view sub-foldersorganization,po, andpom - Drag your pre-formatted CSV file into the correct folder within
Upload - Verify that the uploading process completes successfully in the
Transferspop-up window that appears
Directory Conventions
The conventions for directory structure, file names, and file format are described below.
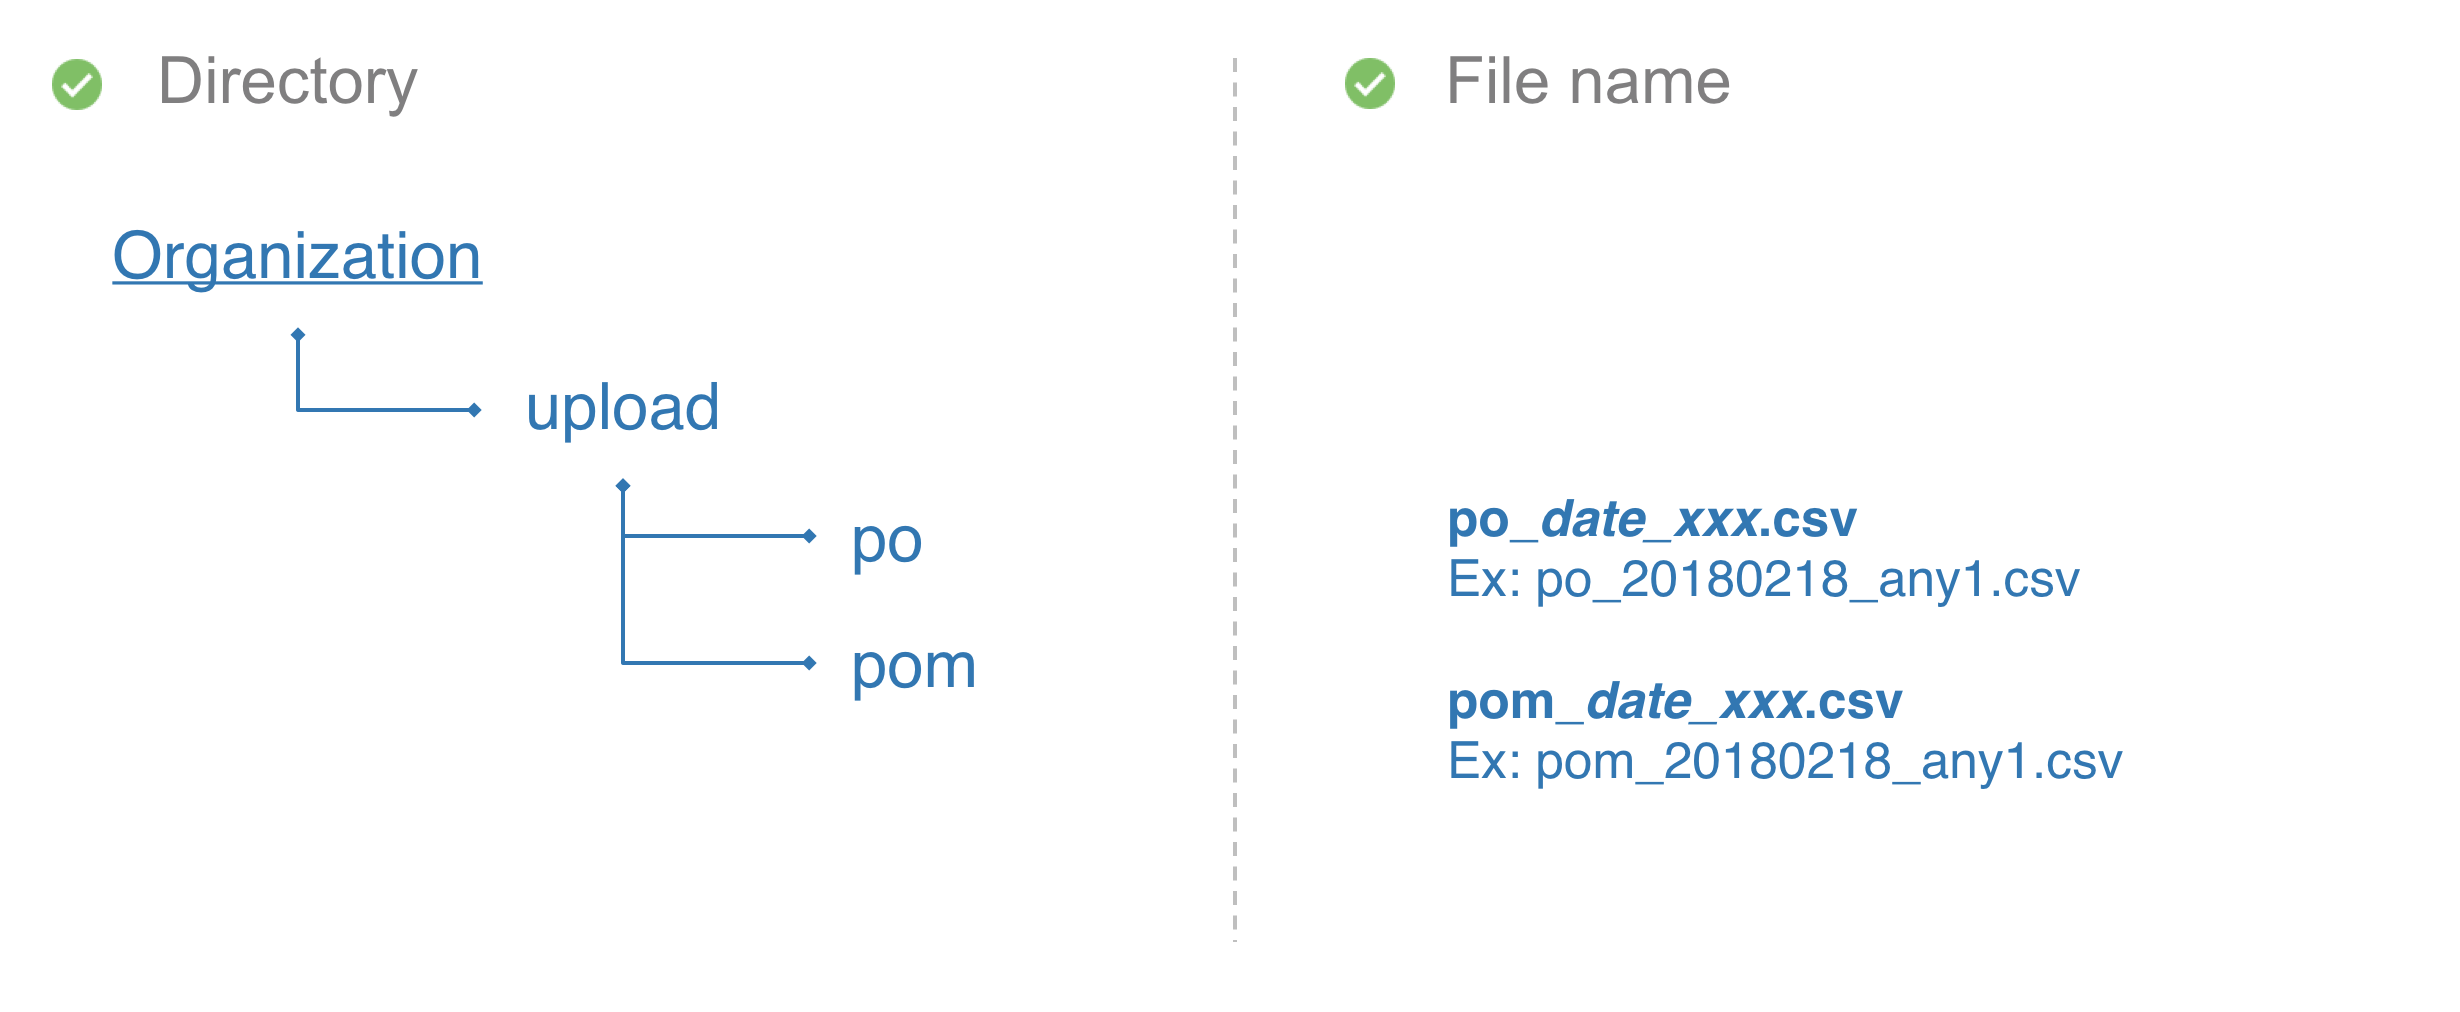
The root directory will include a special folder named “upload” for you to upload your CSV files. In the “upload” folder, there is a different sub-folder for each type of data file (“PO” folder and “POM” folder).
The file name should follow the conventions above.
To avoid issues, please follow these limitations:
- File name length: maximum 128 ASCII characters.
- File size: maximum 20 MB, around 1 Mb is recommended.
- File content encoding: UTF-8 without BOM.
- File content CSV format: column separated by a comma (,), a string should be in double quotes (“) if there are special characters (Ex: comma).
Data Structure Specifications and Resources
Please refer to these files to understand our data structure for purchase orders and measurements.
- Specifications in PDF – Understand our data structure for purchase orders and measurements.
- Sample of Purchase Orders in CSV – Upload in /{bucket_name}/upload/po
- Sample of Measurement Charts in CSV (Bulk) – Upload in /{bucket_name}/upload/pom
- Sample of Measurement Chart in CSV (Single) – Upload in /{bucket_name}/upload/pom
- Sample of Organizations in CSV – Upload in /{bucket_name}/upload/organization
- Sample of Lab Test Reports in CSV (Beta) – Upload in /{bucket_name}/upload/labtestreport
In order to download the files, right-click and click “Save As”.
3. Data Mapping
Your Inspectorio Implementation Manager will schedule a phone call with you or someone from your team to align terminologies.
The goal of this meeting is to align your internal data fields to the Inspectorio data fields. Using Inspectorio data fields is required for File Transfer.
Each company has their own way of processing and tracking inspection data. Thus, it is common for companies to have different ways of referring to similar concepts. For example, in Inspectorio, “Item” is the term for “SKU” (stock-keeping unit), and each “Item” has a unique style, color, and size. It is possible that the data field “SKU” in your internal system could be mapped to “Item_ID” in the Inspectorio data structure. In order for your company to use Inspectorio successfully, it is pivotal that there be alignment between your terminology and ours, especially during data transfer.
4. Send Real POs
After data mapping, you should be able to test sending purchase orders with real data.
In order to make this corroboration step as thorough as possible, we ask that you send at least two POs with packing information; one PO with assortments and another with solids. At this step, we encourage you to send as many POs as possible containing the data that you will expect to see in the POs in the Inspectorio Sight platform.
We encourage you to explore the sample POs listed in this sample PO file as well as the guide on File Transfer Formatting available in this developer’s portal.
5. Production Authentication
Your storage service account will be used to transfer live data for real inspections, so it is important to verify connectivity with your testing account first. Once you have proceeded to thorough testing on your end, you can start sending data to your production account so they are available to your end-users and associates’ users.
At this point, you may wish to develop a script to automate the transferring of files.
Note:
POM charts can be edited manually through Inspectorio’s UI when creating a booking; however, such edits will not produce permanent changes on the POM files stored in the back-end. We currently do not support POM file editing capabilities in the back-end. If you wish to make a change to any of the fields of a POM chart in the back-end, you must upload a new POM file, with your desired changes, which will replace the existing one.
Once you finish these steps, you have officially completed File Transfer.